
Pattern: My own
Yarn: Jojoland 100% wool in Hawaiian Blue (1.5ish skeins)
Needles: 4.5 and 5mm
New skill: Braided cables
 I made these with Spring in mind -- it's bicycle riding season! I don't like to wear mittens when I bike because I find they are too slippery on thr brake handles. And given that I lost one of my nice leather gloves after only a few weeks, I figured I'd make some fingerless mitts. I wanted to make sure they covered my some of fingers and a bit of my thumbs to keep me warm -- it is still pretty chilly in Montreal.
In addition to the extended finger covering, I also made sure to knit extra-long arms on them. I want to make sure no cold air sneaks up my sleeves! The pattern is reversible, so I made two copies of the same mitt.
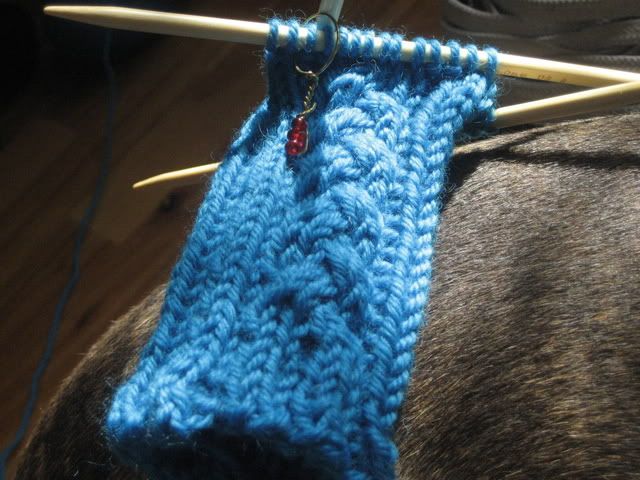
My favourite detail is the way that the ribbing feeds into the cables. Here is the WIP picture I posted whe they were actually in progress:
Overall, this was a great weekend project and I'm very happy with them. I kept detailed notes and have a few tweaks in mind if I ever knit them again.

2 comments:
I really like that color blue! I've been knitting a scarf for myself recently, since I got rid of mine (stupidly thinking I wouldn't need cold weather gear so far south as Texas when we moved), and some arm warmers would be another good project. But how do you do the cables? That looks pretty complex. I just do the standard knit 'n' purl thing...
Well hello there! Cables are so easy, you'll be amazed. A lot of people use cable needles (like a DPN but with a dip in the middle), but I just use a spare DPN. Simply slide a few (e.g. 2) stitches from your left needle to the spare needle and hold it either in front or in back of your work. Knit the next few (e.g. 2) stitches from the left needle, then knit the stitches from the spare needle. Try it, and you'll understand it right away.
Post a Comment